
 (Photo: Here)
Hi Folks,
This is a rather longish post on beekeeping; for those of you not interested in this subject matter, I'd recommend that you skip down to the following post. Since I'm assuming that most of you aren't familiar with the lovely art of beekeeping, I'm going to describe the basic bee box setup and the costs that we've incurred thus far. If you're just interested in costs, scroll down to the very bottom.
A quick note about costs: startup costs for beekeeping are significant! I've already twice exceeded my initial budget. While it's possible to purchase used equipment, there are significant risks associated with that option (I'll discuss this later) and you'll most likely find yourself purchasing brand new boxes and frames, which are shockingly expensive. I'd recommend finding a buddy to split the costs with; it makes for a happier pocketbook and there will [hopefully] be lots of honey to split between the two of you.
Disclaimer
A short disclaimer: I am a novice beekeeper. In fact, I've never kept bees before, although I did grow up around them as a child. You might want to keep that in mind when reading this post. That said, I'm not stumbling along completely blind: my mother, Karin, kept 12 hives in the Central District (of Seattle) over 20 years ago. I think that qualifies her as having a fair amount of beekeeping experience. Of course, said experience is 20 years old. Another thing to keep in mind when reading this post.
The Setup
Here is the setup: We will have two hives. They will be kept at Mom's house in Seattle. We are evenly splitting startup costs. We ordered our bees through the Puget Sound Beekeepers Association. They should arrive on April 18th. (You'll notice that many beekeepers around the country have already received their bees. It's colder and wetter up here in Seattle so we have to wait a while longer). I am doing all the initial work to get the hives in working order; both of us will participate in getting the bees situated into their respective hives. Mom will probably do the weekly hive checkup since they'll be located at her casa.
The Basic Hive

-Bottom board (also called a floor or a base). This is what you stack the boxes onto. It is also the main entrance to your hive.
-Brood boxes (also called brood supers or "Deeps"). These are the deepest boxes in the hive and they are stacked directly onto the bottom board. Here the queen lays her eggs and the workers store honey. Two brood boxes are stacked together on the bottom board.
-Queen Excluder. The queen is bigger than the workers. Fatter and longer. A fine-meshed screen is placed on top of the upper brood box, making it impossible for her to access the upper boxes. Why do this? Well, if she can't fit through, she can't lay any eggs in the upper cells. That means that only honey will be stored in these upper areas.
-Honey supers (also called simply supers or "Shallows"). These are the narrow boxes that are stacked on top of the queen excluder. Honey will be harvested from these boxes. The brood boxes will remain in place throughout the winter. The hive will live off of the honey stored in the brood boxes while we enjoy the honey from the honey supers. That's the theory, at any rate.
-Frames. Each wooden frame is filled with a sheet of honeycomb. Some people cheat and use a thin plastic sheet covered in honey comb. We're cheaters, we're using the plastic version. The bees will create cells on the plastic that will be filled with honey.
Used Equipment/Bee Box Prep
Now, some information on why it's generally not a good idea to purchase used equipment. There are several bee diseases out there, including a particularly noxious one called fouldbrood. It comes in two strains: American and European. If your hives are infected by foulbrood, you must immediately kill the colony to prevent the disease from spreading to other hives. Many beekeepers burn all the equipment: boxes, frames, combs, etc. Heartbreaking. Twenty years ago, my mom's bees came down with foulbrood, the bees were subsequently killed, and the bee boxes were fumigated (sprayed with highly toxic chemicals). Apparently they don't fumigate boxes anymore because the chemicals used were so nasty. Now they just burn the boxes. After fumigation, the boxes sat in our garage for two decades. Until this year. When I decided that that we needed to put them to good use.
 Here are our boxes, looking a bit dismal after spending 20 years in the garage
-
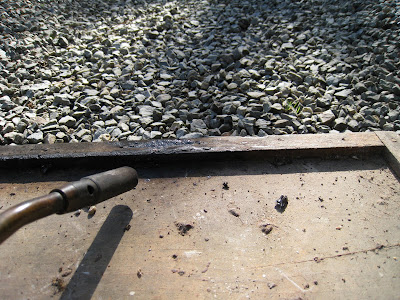
I did some research on using bee boxes that had been contaminated by foulbrood. Bad news. Foulbrood spores can remain viable for 40 years in affected beekeeping equipment. This is the most compelling reason to purchase new supers and frames. Unless you really trust the seller, there is no guarantee that your newly purchased equipment won't be chock full of lethal fouldbrood spores, not to mention other nasty things. The good news for us was that our boxes were fumigated, hopefully killing the spores. To minimize the risk even further, I spent the last three days with a blowtorch, charring the inside of each super to a nice black patina. My mother says that I came into the house smelling like smokey honey. Heavenly. 
 Parts that couldn't be torched were washed in a strong bleach solution. Keep your fingers crossed. We're taking a risk here by using formerly contaminated equipment. We did throw away the interior frames (which hold the honey comb), which are said to be the most likely to contain foulbrood spores.
Parts that couldn't be torched were washed in a strong bleach solution. Keep your fingers crossed. We're taking a risk here by using formerly contaminated equipment. We did throw away the interior frames (which hold the honey comb), which are said to be the most likely to contain foulbrood spores. -
After the equipment with thoroughly charred, I used a scrapper to scrape most of the propolis off of the inside of the boxes.  Following the scraping, I used a belt sander the remove the remaining wax and charred material (yay for power tools).
Following the scraping, I used a belt sander the remove the remaining wax and charred material (yay for power tools).


Following the sanding, I painted the boxes. We saved a bit of money by using paint that we had laying around the house. Hence the wacky color scheme.  Please note that only the outside of the boxes are painted.
Please note that only the outside of the boxes are painted.  TaDa! Those are some fine looking bee boxes! Note that only the two deepest boxes (on the bottom) will initially compose the hive. Shallow supers will be individually placed on top as our bees require more space for honey production.
Now we're waiting for our frames. Hopefully they'll arrive before the bees since they require assembly. Once our frames are completed, we'll stick the plastic sheet that has been finely coated with beeswax. The bees will 'draw out' the frames, creating small cells out of beeswax. Each cell with be filled with one egg (which will develop into a worker, a drone (male), or a queen), honey, or pollen.
Note
A small note on painting: I used two colors of paint. Grey and blue (periwinkle). I painted the grey first. Like a good girl, I carefully read the paint instructions. I noted that it was latex (WATER BASED). When finished, I carefully cleaned the brushes and equipment in the sink. All was ducky. I moved onto the blue paint. Since I was now a painting expert, I did not read the directions. When I was done with painting, I admired my handiwork and then took my equipment back to the sink for cleanup. Except that this paint wasn't waterbased. I only discovered that after I had added water. Big oops. Did I mention that I was doing cleanup in the kitchen sink? My mom's very WHITE kitchen sink? With bright blue paint? To her eternal credit, I have one of the calmest moms on the face of the earth. I think it helped that periwinkle is her favorite color. Cleanup took an extra long time. Let this be a lesson to everyone.

Costs
So, we obviously had some of the equipment, cutting down on our costs. We still had to purchase bees, frames, and some miscellaneous equipment, which I've broken down for your perusal. We ordered our supplies from Western Bee, which I've heard is one of the cheaper options, at least for the West Coast Folks. Their website is currently down so I ordered over the phone. Other options include Dadant & Son and Brushy Mountain.
-
-Package of Bees with Queen: $70 x 2 = $140
-Deep Wooden Frames: $0.50 x 40 = $20
-Deep plastic fillers (that go into the frames): $0.97 x 40 = $38.80
-Shallow Wooden Frames: $0.49 x 40 = $19.60
-Shallow plastic fillers (that go into the frames): $0.82 x 40 = $32.80
-Shallow Wooden Frames: $0.49 x 40 = $19.60
-Shallow plastic fillers (that go into the frames): $0.82 x 40 = $32.80
-Frame nails: $1.00 x 2 = $2.00
-Economy hive tool: $3.75
-Safari hat: $8.75
-
Grand total: Including tax and shipping: $319.21. Yeah, not cheap at all. Maybe you should recruit more than just one friend to help offset the costs.
-
Now, let's talk about what we DIDN'T buy, since we saved money on some big ticket items:
-
-Boxes (big, expensive items) For two hives, you'll need a total of 4 deeps ($ 14 each x 4 =$ 68), and at least six shallows ($ 14 each x 6 = $84 ). Approximately $ 152 .
-Bottom boards (2). $30 total.
-Queen excluders (2) $ 12 total.
-Inner lids (2) $20 total.
-Outer lids (2) $30 total.
-Smoker (1) $ 29 .
-Gear: hats with/veil (1): $ 10, gloves (1 pair): $10 . Some people buy the entire outfit but I don't think it's really necessary.
= $293. (A few caveats: Don't quote me on these prices. They were quickly pulled from the Dadant catalog. Secondly, I know you can buy pre-assembled hive kits. Perhaps these might be cheaper than buying pieces individually. I looked at the price per item cost since I needed only a few select parts. Lastly, I only bought enough honey super frames/cell sheets for two honey supers per hive. Why? Well, for starters, I live in Seattle, where it's cold and we have a shorter honey collecting season. Secondly, the bees will have to spend a lot of time and resources 'drawing out' the combs. This reduces your overall honey yield the first year. The second year you should be able to reuse the combs. And last but not least, I can order more if I find that we're running out. I'm way over my initial budget and I don't want to spend more money upfront if I don't have to)
So, add another $ 293 to that $319 that we spent and you're looking at a startup cost of at least $612, not including tax and shipping (where applicable). Major ouch. Now, if you find that you love beekeeping and will continue with it for the next decade, you'll be set in terms of equipment. Again, these are SETUP costs. Yearly costs will include the following: replacing colonies, should they not make it through the winter. Also, some folks medicate their bees, which will also carry a nominal yearly fee. Come fall, you'll also have to rent a honey extractor and have plenty of food grade buckets on hand in which to store your honey.
-
Ok, that's the scoop. Wish us luck this year in our new beekeeping endeavor!