
Peeps,
Here is the finished Big Map Project.

It is seriously large. The print, not including the frame, is about 48"x78". We bought this map, from Metsker Maps in Pike Place (which is a gem of a store, if you live in the Seattle area).
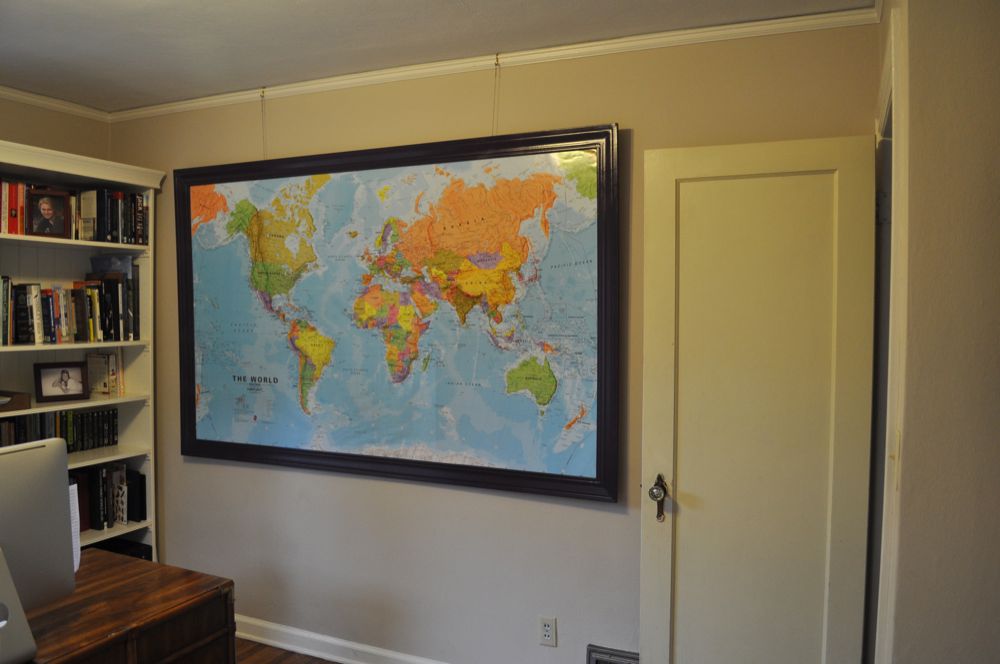
You'll notice it's a bit off center on the wall to leave room for opening the door. But in the event that I can find a long door stop, it would be easy to scoot over so it's centered as it is hung on a picture rail (no nails or holes in the wall).

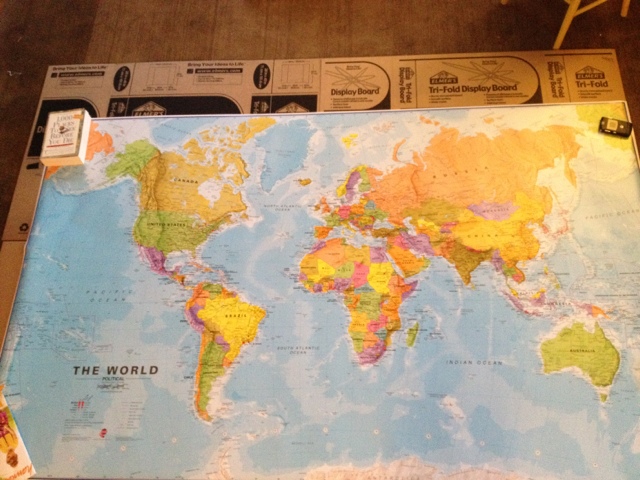
You'll remember that we started with this:

In hindsight, I wish I'd paid the $30 extra and had it mounted on foam board by the store. [not sure how I would have fit it in the car though] because my solution was to go out and buy several sheets of flat cardboard for the backing:

It worked out decently well, but not as great as foam board. You can see some of the seams in the finished product and there are even a few bubbles. Definitely an amateur job.
A little spray on adhesive worked wonders in attaching it to the cardboard

It required a lot of adhesive. This sucker is huge.

All done. Now time to trim off the excess cardboard.

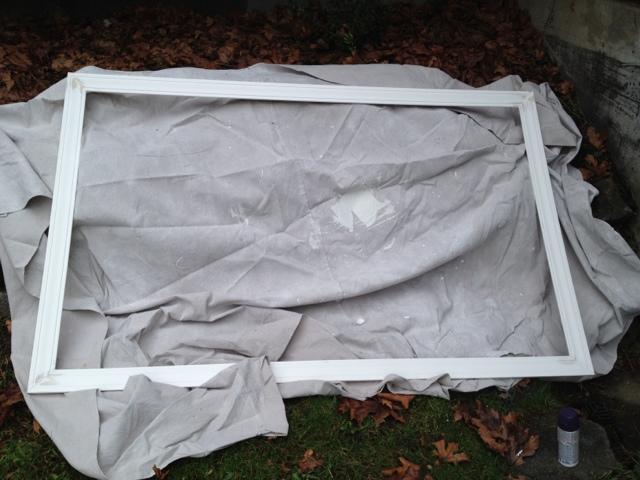
Once the map was backed, we spent a fair amount of time debating about the proper framing materials. We had a lot of left over door trim and baseboard that would have worked, but wasn't ideal.

Eventually I trundled off to the store and found a trim I was happy with. I toted it home and set about cutting it with the chop saw.

This is a relatively straightforward project as all the cuts are at 45 degree angles. My only issue is that I tend to forget about the kerf (width of the saw blade), which may not sound like much, but even 1/8" can make a difference when attempting a perfect square.

The other thing to keep in mind with MDF trim is that it is very, very flexible. Given that you'll likely be hanging the piece by the frame, it needed some support in the form of some real wood:

These four piece were attached to the back of the frame at the corners to lend support. I also did several flat piece along the top, so the picture hardware would have solid foundation.

Jig saw work:

They don' have to be pretty, nobody is going to see them:

I used a LOT of wood glue on my support pieces, as well as the seams between the frame pieces:

And clamped the whole shebang together and then let it dry for 24 hours.

The hardest step for me was filling the seams. We've done a lot of baseboard and trim work in our house and I'm the designated caulk-er person. I'm decent at it but definitely not an expert. So this was not a huge departure from that, but getting a smooth finish is always tricky.

The step that isn't shown here is the sanding. You'll want to sand down any filler. I've found that anything visible before painting will be twice as visible after painting. Thus is really makes sense to be happy with your sand job before you break out the paint.
I did a primer coat first as the sanding had scrubbed off some of the factory primer.
And then, the real color. Again, I'm not an expert here but I find that four light coats of spray paint looks much, much better than two heavy coats. Fewer drips, for one thing. Although it kills me to have to wait for each coat to dry. Here it is after the first coat (it always looks like crap):

After that, it was simply a matter of popping the cardboard map into the frame, nailing in a few picture hangers, attaching wire, and hanging it on the wall.
Huh. I think it's actually slightly crooked, now that I look at it. Time to go fix that, Peeps!
As you can see, the pins aren't visible from far away. It's only when your nose is about 12" from the paper that they come into focus. Which is good: the point of this project isn't a bragging board. It is, first and foremost, an educational tool: So that's where the Marshall Islands are!. And it's a "Where the heck shall we go next?"project. Definitely a place for dreaming and scheming.

But like I said in our earlier post, it was fun to put the pins in, too. Especially now that we have a color that includes Benjamin: GREEN!

xxoo, Sonja